
My Meyer Lemon Tree displaying telltale signs of dehydration. The leaves are slightly curled and beginning to yellow. This was easily remedied by remembering to water daily until the water flowed freely from the drainage holes in the bottom of the container.
So you learned about selecting and planting a fruit tree in a container in this post, but what do you do once it’s planted? How do you care for the tree? What if the tree isn’t producing any fruit for you? Well, read on and hopefully I’ll answer some of your burning questions.
Mulch
Mulch is incredibly important to the long term well being of your container plants. The reason for this is that mulch slows down the rate of water evaporation, helping to keep the soil in the container moist for longer periods of time. As containers dry out quickly, a thick layer of mulch can mean the difference between watering twice a day in high summer and once a day or even every other day.
Mulch also slowly breaks down over time, adding to the organic matter in your container, acting as a slow release fertilizer. If you add compost worms to your container, they will speed up the breakdown of your mulch and make their own fertilizer in the form of their castings (poop).
So, what should you use as mulch? There are many different options. You can use shredded paper, cardboard, shredded leaves, aged (not fresh!) wood chips, sticks, tree bark, pine needles for acid loving plants like blueberries and camellias, compost, trimmings from nutrient mining plants, and other living plants. So many options, right?! Use what is readily available to you and makes sense for your situation. When we lived in a cul de-sac I used shredded paper as my primary mulch, then in the fall when lawn maintenance mowed all the fallen leaves and blew them into piles around the big trees I would take a big container and fill it up with leaves to top dress my containers. The paper would solidify into a pulpy, dry mass, but the soil would be moist right under it and the worms were happy. The leaves added another layer of protection, allowing the paper to stay moist so the worms could break it down as well.
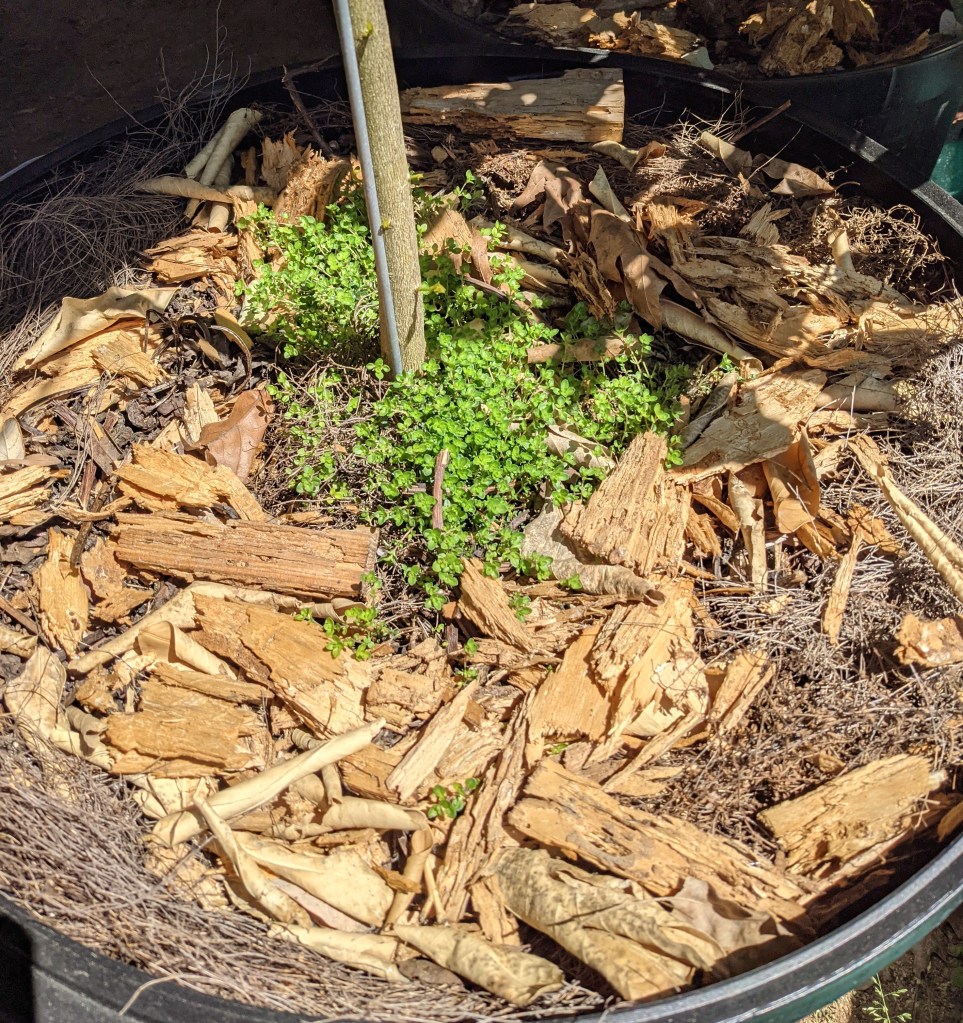
Now that we live in the middle of the woods, I use a combination of materials for mulch. I do a base layer of dry leaves and nutrient mining plants like fava beans, then a layer of sticks and twigs, then a final layer of tree bark. I sometimes plant sprawling herbs like creeping thyme and mint in order to get two products from one container. Just know that if you do this you will need to supplement the soil a bit more to compensate for the additional plants. I am currently experimenting with using fungally active wood materials as well as clover cover cropping inside the containers. Clover fixes nitrogen in soil which means I would not need to add any nitrogen fertilizer to the container. I’ll update you on the results in the Summer.
NOTE: when mulching your tree, make sure to leave space around the trunk. The trapped moisture can cause the trunk to rot, which can kill your tree.
Fertilization
Full disclosure, I am the absolute worst at remembering to fertilize anything regularly. This is why I am such a big advocate for getting your soil and mulch in a really good place right off the bat so your plants are set up for success even when you fail to feed them regularly. With that, they certainly will not mind being fed on a normal schedule.
In the Spring, when they are beginning to break dormancy, give them a nice topdressing of fresh compost/potting soil, about an inch or two. Mix in some worm castings, rock phosphate for stem/trunk development or an organic fruit tree fertilizer, azomite or rock dust for trace minerals, and water it all in with seaweed extract and fish emulsion. Also freshen up your mulch too as much of it probably broke down over the past growing season.
Make sure to follow the package directions for quantity and frequency for all fertilizers you choose to use. The worm castings I currently have sitting in my potting shed recommend one half cup mixed into your container just a few times a year, while the seaweed extract recommends diluted watering roughly every two weeks. More does not mean better when it comes to fertilization as too much of a good thing can hurt the plant as well as lead to nutrient lock-out, preventing the plant from up-taking the nutrients it needs. You may also get opposite results from what you are looking for! By providing too much Nitrogen for example, you will get a beautiful bushy plant with lots of new leaves, but less fruit.
Repeat your fertilization regime per the package instructions, giving extra care during the flowering and fruiting season. This is when your fruit tree is putting all of its energy into growing. The last thing you want is for the tree to reduce fruit production because it cannot access all the nutrients it needs. Also, since you are growing your fruit tree in a container THINK OF WATER AS AN ESSENTIAL FERTILIZER. The container will dry out quickly, especially if it is small, so if you do not water regularly, daily in Summer, every other day or every few days in Spring (watch your soil), the tree will become stressed and focus just on survival rather than fruit production.
Settling and Repotting
If the soil settled in the container over the past growing season, freshen up the soil by repotting. Settling is when the soil was nice and fluffy when you first planted the tree, then it slowly compacted over time, sinking down a few inches or more into the container. This reduces the amount of space the roots have available, defeating the purpose of using a nice big container. Repotting is a great opportunity to freshen up the soil, add some fertilizer, and transfer the tree to a larger pot if needed. All you need are: good quality potting soil, bottom drainage, your new container if applicable, a tarp or something to hold the old soil and tree’s root ball, fertilizers, and fresh mulch.
- Remove the old layer of mulch so you don’t end up wearing it when you pull the tree out of the container. Place it in a pile off to the side so you can add it back when you are done.
- Loosen the root ball and ease the tree out of the old container and onto the ground or tarp. This is a great opportunity to check in on the health of the tree’s root system.
- If any soil stayed behind, dump it out onto the tarp.
- Place your container in its final location or on a handcart so you can move it easily when you are done.
- Add your drainage material of choice (read about that here) to the bottom of the container, then add fresh potting soil, mixing it with some of the old soil you dumped out and breaking up any large chunks.
- Mix in your fertilizers, rock dust, and more potting soil until the container is full enough for the root ball to sit just about level with the top of the container. Make sure to firmly pat the soil to reduce additional settling.
- Gently fit the root ball into the container and fill any gaps. I always invariably have one side of the root ball a bit lower than the other so I have to pack soil under the root ball on one side until it sits level.
- Top dress with compost, mulch, and compost worms if using.
- Water in with seaweed extract and mycorrhizal fungi, if desired.
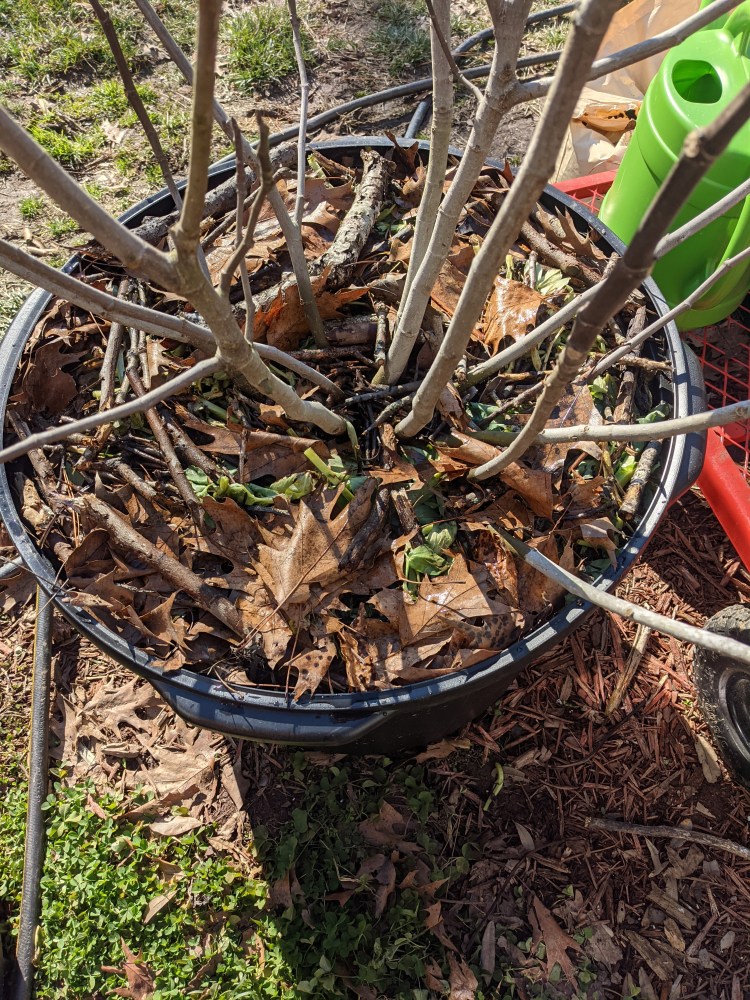
The soil in this 25 gallon container sunk down almost a foot since planting the blueberry bush in it a year or two prior meaning it was well overdue for a re-potting. 
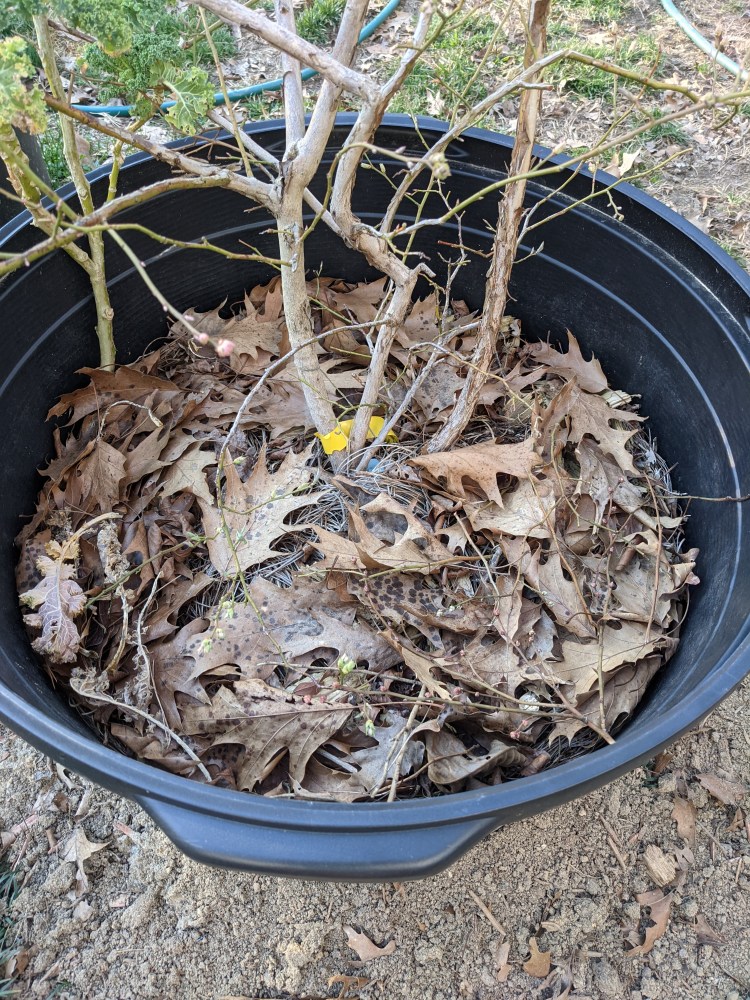
The blueberry bush with a perennial kale plant I had shoved in there there a few years ago sitting on the ground after being removed from the pot. You can see the old mulch, a layer of decomposing pine needles and leaves. 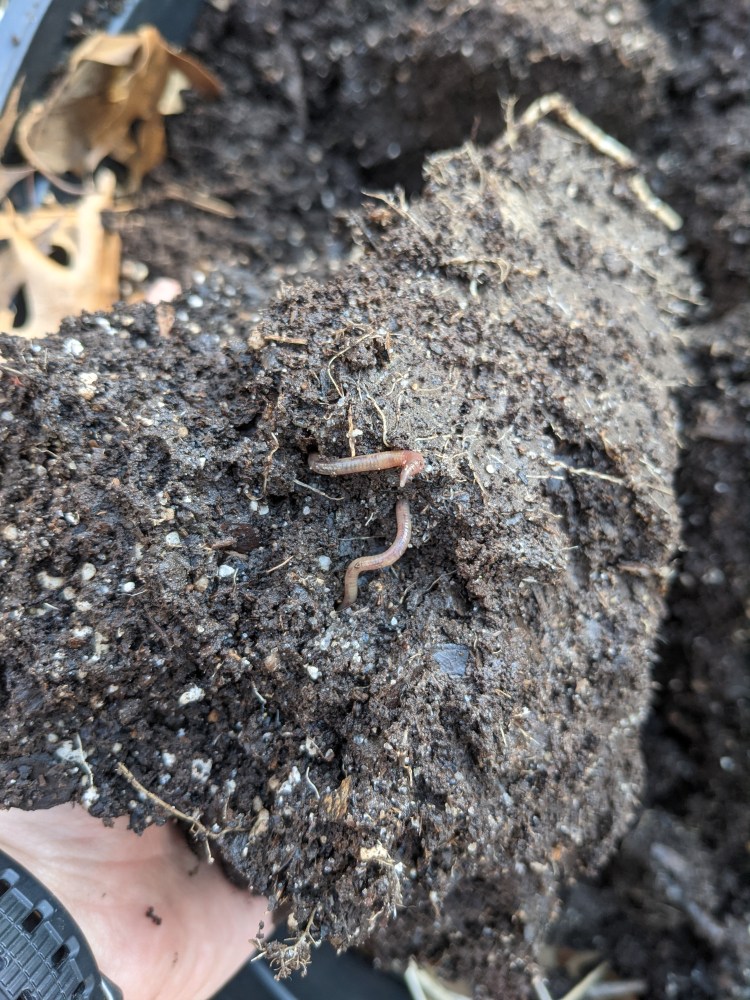
A clump of soil from the very bottom of the old container with a few earthworms exposed. 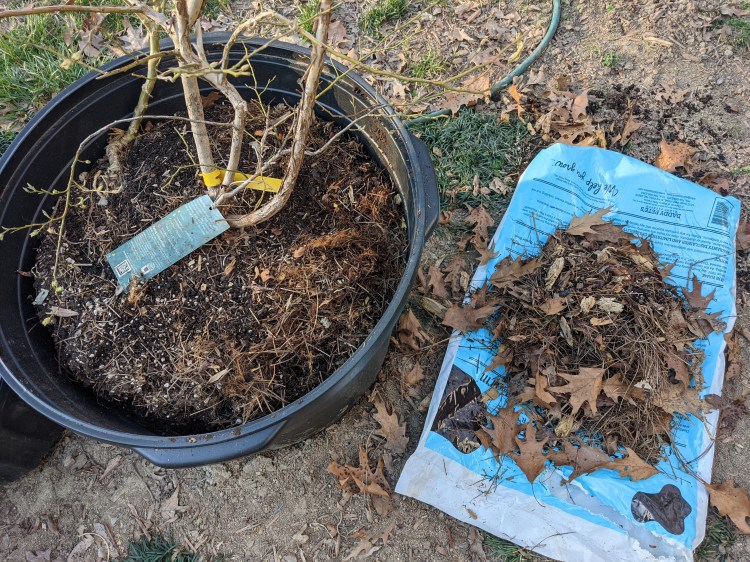
Once I eyeballed the amount of soil in the bottom of the pot to be about enough, I placed the root ball of the blueberry bush back into the container. It was still a bit low so I needed to shove more soil underneath to help raise it up. You can also see the old mulch piled on the potting soil bag next to the container. 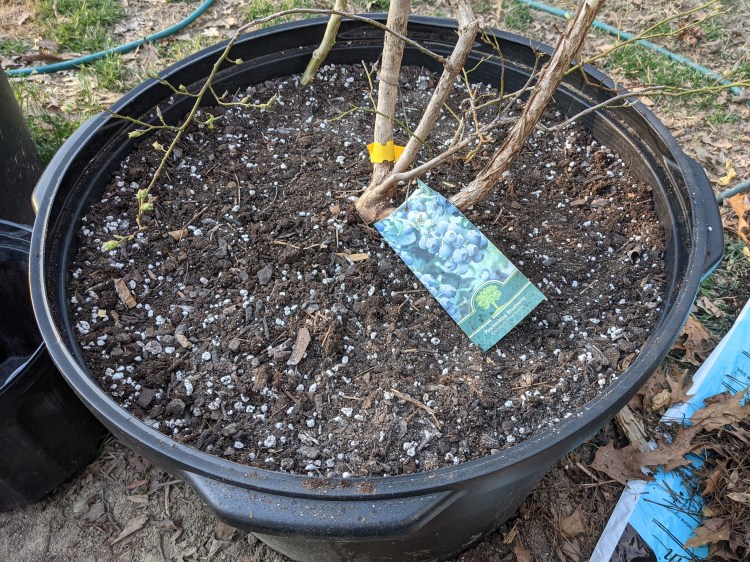
The bush is tucked in with its new soil and amendments, the soil level just a few inches below the top of the container. 
The main stem of the blueberry bush is free of thick mulch. The pine needles and leaves cover the soil but are not bunched up around the stem which will help keep the stem dry and free of rot. 
The blueberry bush freshly potted with a new layer of pine needles and bark.
Overwintering
The tree’s growing zone dictates what you need to do in order to successfully overwinter it. Most citrus for example can tolerate temperatures dropping down to 32F so you can choose to either bring them inside where it will think it is Spring and burst into flower and put out new growth (make sure you provide plenty of supplemental light so the new growth is not spindly). Or you can make a greenhouse like structure using shower curtains or plastic sheeting in a location like a carport or pole shed where the tree still receives plenty of light.
Deciduous trees, trees that drop their leaves in the winter, can be left alone for the most part. Make sure they have a nice thick layer of mulch on top of their container, and try to remember to water the day before a deep freeze. The water will help insulate the roots to reduce any potential cold damage. You can wrap the container with a blanket or two to also help insulate against a deep cold. One other technique I recently learned about while visiting a nursery is where you dig a hole in the ground and plop the container into it so the soil acts as insulation. Then in the Spring you simply pull the pot out of the hole and you are good to go from there. Neat, right?
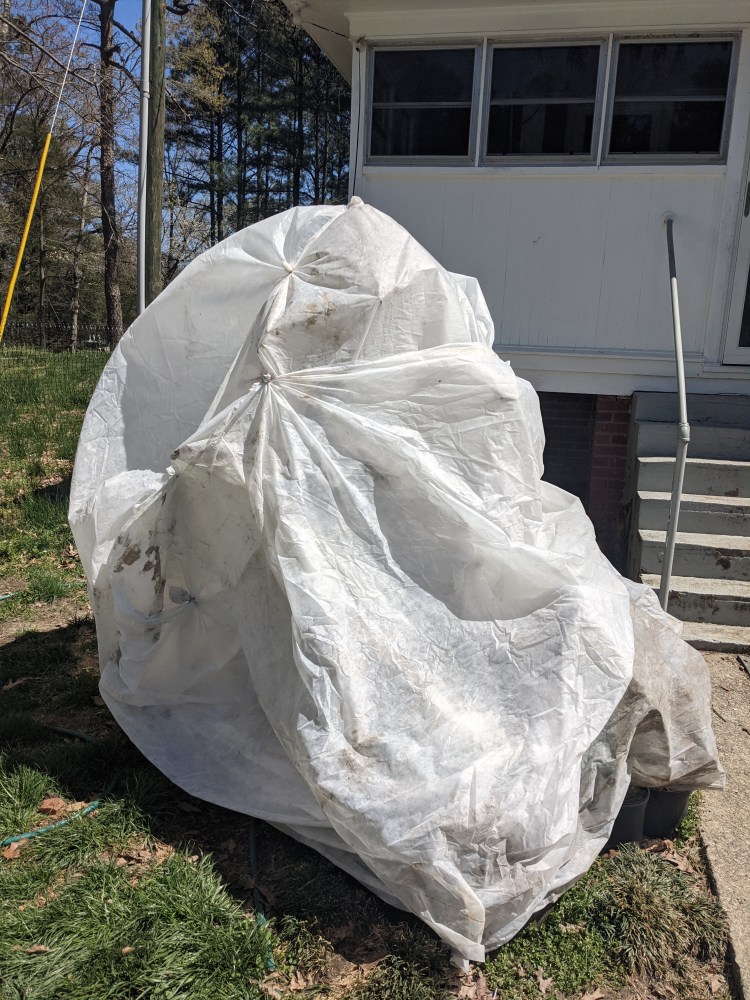
The trickiest part of overwintering is protecting the tender new growth from late season frosts. If your trees have just broken dormancy then they should be able to handle a little frost just fine. If they are really leafing out or flowering, that is when you want to make sure you get them covered. You can use old towels, or light weight blankets (nothing heavy since the weight can damage the branches). If you have a lot to cover, you can stretch a tarp over them and try to not have it come into contact with too many leaves. The condensation that will form on the plastic can freeze and damage the leaves. The tarp will still keep the frost from reaching the plants though so it is still a good option.
My favorite method though is using lightweight Agribon row covers from my garden. I mummify the trees and hold the seams together with rubber bands. I like this method because the sunlight can still get through the material so I do not need to remove it then put it back on when we have a cold stretch. I can just put it on and leave it on until the cold snap passes whereas you need to pull the other materials off during the day so the trees can still receive sunlight.
Hey, Where’s My Fruit?
Many factors can impact your tree’s production:
- If your tree is less than three-four years old.
- Nothing you can do here except wait. I promise it’ll be worth it!
- If you accidentally selected a tree that needs a cross-pollination partner
- If you have the space, add a pollinator partner for your tree. If you do not have space to add another tree, consider just enjoying it as an ornamental, or rehoming the tree then selecting a self-pollinating tree.
- Lack of adequate and consistent water during fruit set.
- The leaves will begin to curl and turn yellow and if there is any fruit on the tree, it may begin to drop some of it.
- Containers dry out quickly, especially if they are small. Make sure to check and water daily in the heat of Summer since the heat will cause the soil to dry out quickly. Summer also tends to be the time when many trees are setting their fruit so make double sure to not let the tree dry out!
- The leaves will begin to curl and turn yellow and if there is any fruit on the tree, it may begin to drop some of it.
- Not enough pollinator friends!
- You will notice the flowers just shrivel and fall off, or fruit will set but fall off while still very small.
- If you notice not many bees or other pollinators are visiting your tree, make sure to plant some pollinator flowers and herbs nearby to draw them to your tree.
- You may still find it useful to manually hand pollinate the flowers with a small paint brush or q-tip. Simply take your pollination tool of choice, gently collect pollen from one flower, then move to the next flower, and the next, until you’ve collected pollen/spread pollen to all or as many of the flowers as you want. Do this a few times to help guarantee fruit set.
- You will notice the flowers just shrivel and fall off, or fruit will set but fall off while still very small.
- Poor quality soil and lack of nutrients.
- You will notice the tree is failing to thrive, remaining stunted or the leaves begin yellowing and falling off.
- Either re-pot the tree with high quality soil, or top dress the container with compost.
- Make sure you are regularly feeding your tree an appropriate fertilizer and trace minerals.
- You will notice the tree is failing to thrive, remaining stunted or the leaves begin yellowing and falling off.
- Not enough light
- The new growth will be very long and spindly, stretching towards the light. If the tree is so overshadowed it will remain stunted.
- Remove any spindly growth and try to relocate the tree to a better lit location.
- If you can’t relocate it, try to add a white backdrop to help reflect light towards the tree and see if that helps.
- The new growth will be very long and spindly, stretching towards the light. If the tree is so overshadowed it will remain stunted.
- The container is too small.
- If you have a 6’ tall tree in a 5 gallon container, chances are rather slim that the tree will set and successfully mature fruit with such little access to nutrients as well as the amount of stress that kind of cramping induces.
- Bump up the container a size or two and heavily prune if height is an issue for you.
- If you have a 6’ tall tree in a 5 gallon container, chances are rather slim that the tree will set and successfully mature fruit with such little access to nutrients as well as the amount of stress that kind of cramping induces.
So there you have it! I hope this article helped answer some of your questions about caring for your new container orchard. If you have any questions, feel free to comment below and I will do my best to answer them. Good luck, and happy growing!
